Contact me with Repair Questions or updates on Vintage 486 era Packard Bell Multi-Media PC with 770 Motherboard and a Broken Texas Instruments SN75189A SOIC
Click below for updates on repair progress. (Using the form will help avoid SPAM).
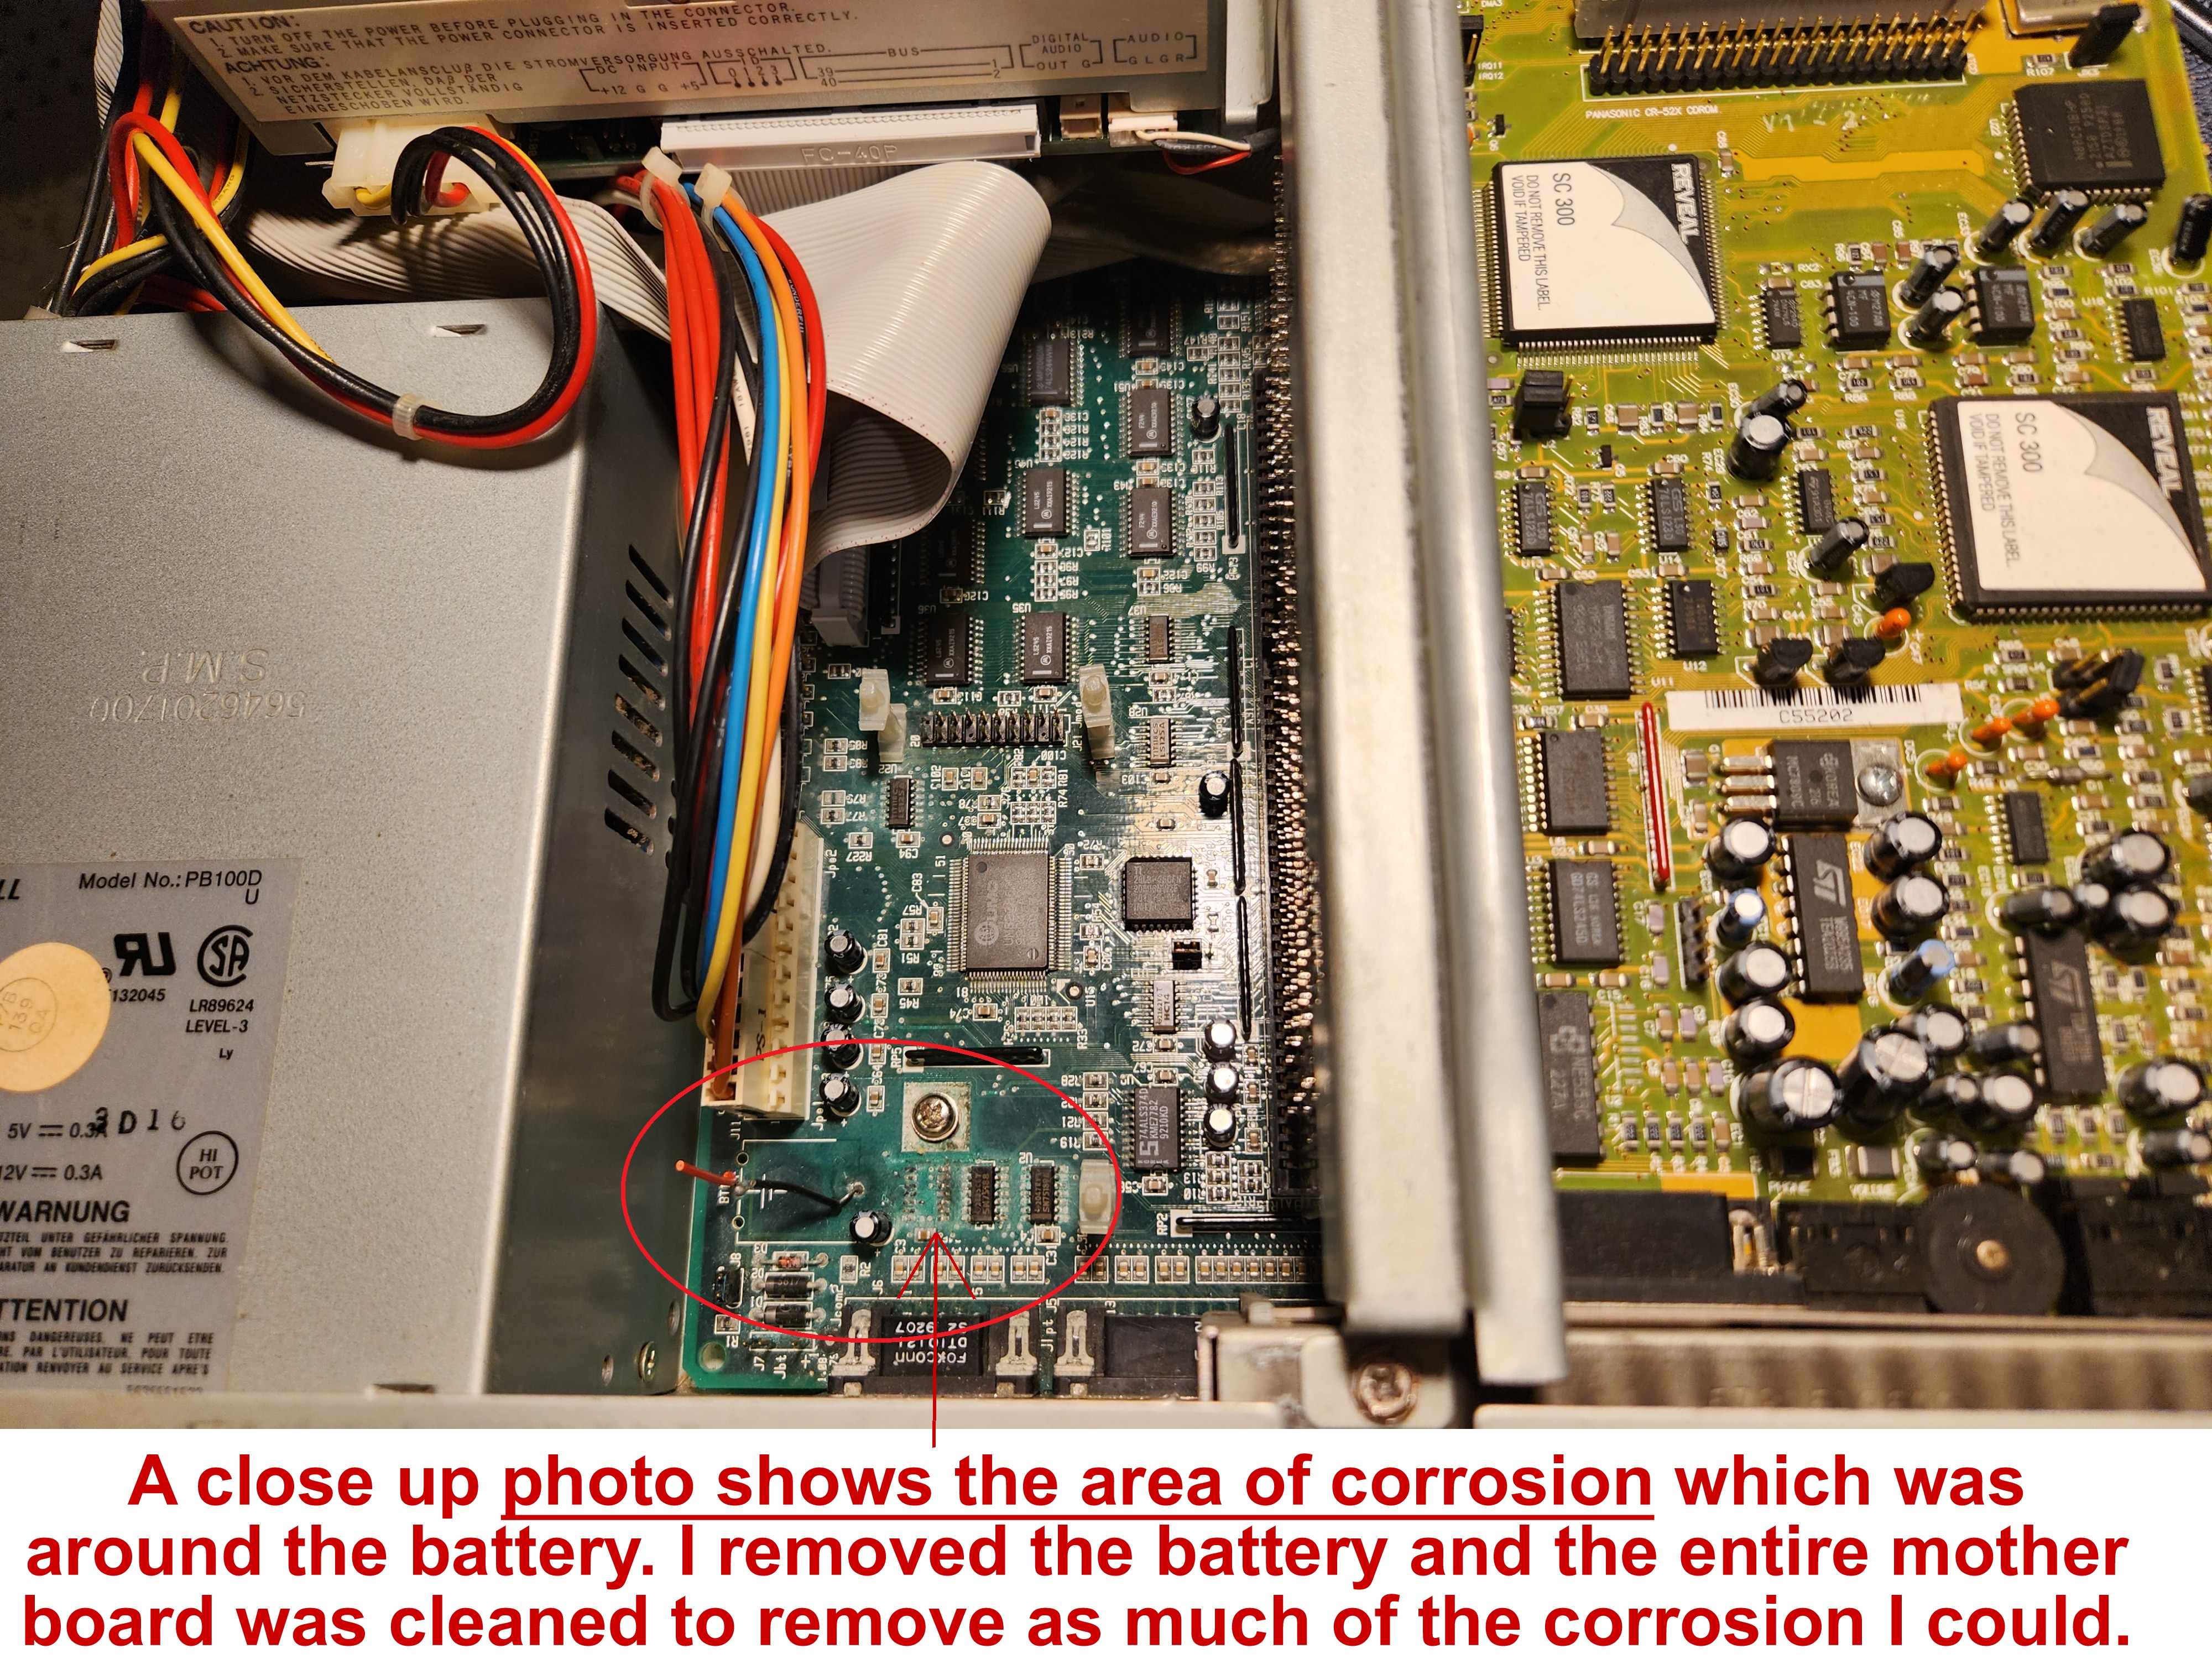
When cleaning dead battery corrosion off a 486 era Packard Bell 770 model mother board, (with a tooth brush, warm water and apple
cider vinegar to help wash off most of the battery acid spillage), there evidently were weak legs on a chip, (Texas Instruments SN75189A
SOIC), half eaten off by corrosion & it slipped off the board.
The Texas Instruments SN75189A is an SOIC / TSSOP (surface-mount), also identified with "2047RYT" and the appearance of 7 legs
on each side, total 14 legs. Now, unless I or someone remounts it or finds a new one, the Packard Bell no longer shows video at post. My
big issue is how small it is plus poor eyesight for tiny soldering.
Typical Response: Oof — classic 486-era heartbreak 😬 Battery goo is ruthless. The good news though:
this is very fixable,
and I’ve already done the hardest part (identifying the chip and stopping the corrosion).
The following guide will break it down for you.
What this chip is doing on the Packard Bell 770
Correctly Idebtified as the common 486 era part, here is the the chip package details:
- SN75189A SOIC-14 (7 pins per side and common on late 80s / early–mid 90s PC motherboards
Identified as a quad RS-232 line receiver. On 486
boards it’s almost always used for:
- Serial ports (COM1 / COM2) sometimes tied into mouse / modem / debug / BIOS POST
signaling.
👉 Important insight: On many Packard Bell and other OEM boards, the BIOS expects
certain serial-port hardware to respond during POST. If SN75189A is
missing or disconnected, a system can hang before video init,
giving you these results: no video, no beeps, PC seems unresponsive.
So it’s common — losing the chip can prevent
video at POST, even though this chip is not a video chip.
You cannot get into the BIOS to turn off COM1 / COM2, but simply replacing chip will solve no posts.
What matters when an SOIC Chip falls off
Troubleshooters describe this as a textbook example of a Chip detached when brushed:
That means:
The Chip Replacement for an Easier Win 😄
Here is a list of 5 direct replacements that are drop-in compatible and any will work
-
SN75189A (TI)
-
MC1489A
-
AM1489A
-
UA1489
-
HD1489
SN75189A can be a TI (Texas Insdtruments) or even a clone, just make sure:
All these are still widely available from:
⚠️ Battery damage can hide, so before soldering double check ⚠️
1. Inspect pads and traces
Under magnification, check:
Are all 14 pads still present?
Do any look dark, lifted, or missing?
If a pad is gone — don’t panic. A bodge wire can also work fine, if you've correctly traced the path.
Do This Before You Solder Anything
An even better way to remount a chip is strongly recommended!
⭐ Option A: Install a SOIC-14 socket if space allows, you solder on a riser to plug in larger leg chips.
3 great options for adapter boards that let you solder a tiny 14-pin SOIC/TSSOP IC once, to plug it into a larger through-hole socket or header, (to not have to deal with this tiny surface-mount soldering again).
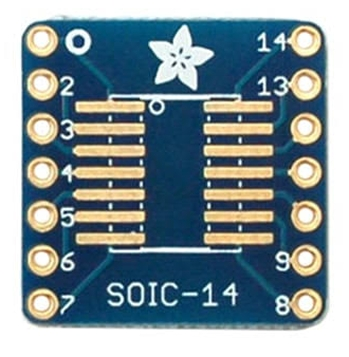
1. Adafruit SMT Breakout
SOIC-14/TSSOP-14
$4.95 (Adafruit + others)
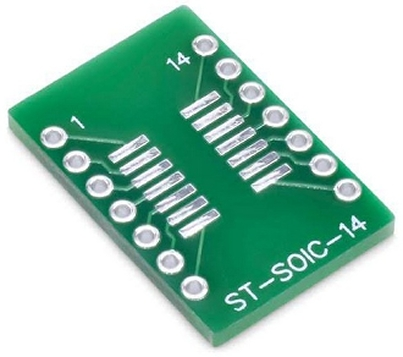
2. SOP-14 SMD to DIP
Approx. $1.89
(DigiKey + others)
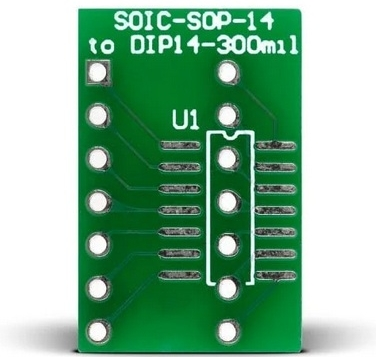
3. SOIC-SOP-14 to DIP14
Approx. $5.94
(Mikroe)
Summary of Installation Steps for Ease and Success
Option A: Using a Socket
Plugging a replacement chip into a socket is very retro-repair friendly. It avoids heat stress, makes future swaps easier, and provides stable connections.
After replacement: what to expect…
Once the SN75189A is back: